Getting Down to Elevating Your Bird Photography
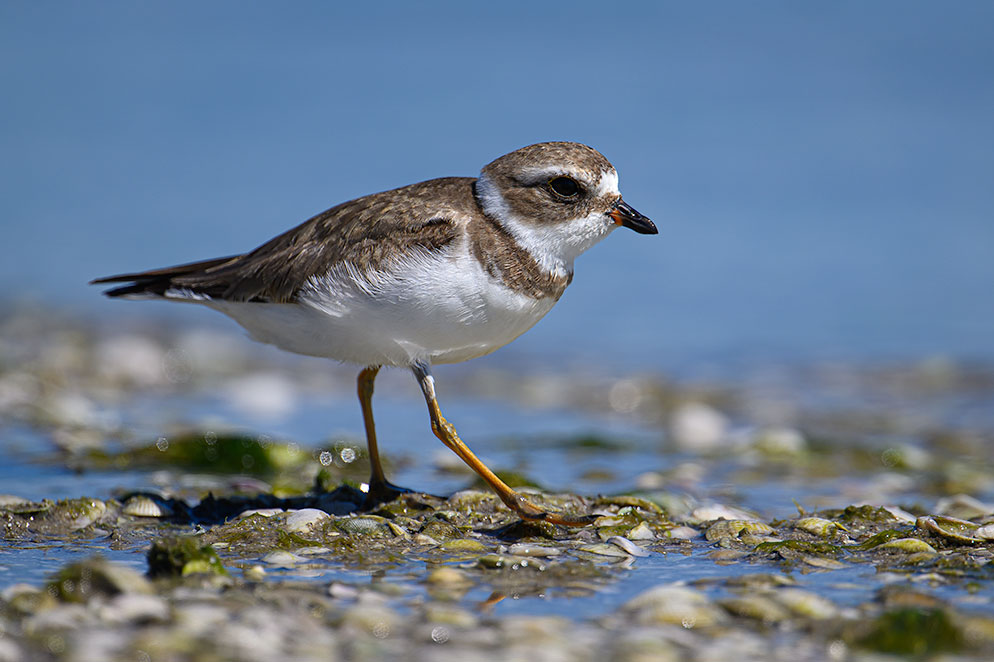
Semipalmated Plover - Z 9, NIKKOR Z 400mm f/4.5 VR S TC 1.4x 1/800 sec, f/6.3, ISO 100, Aperture priority.
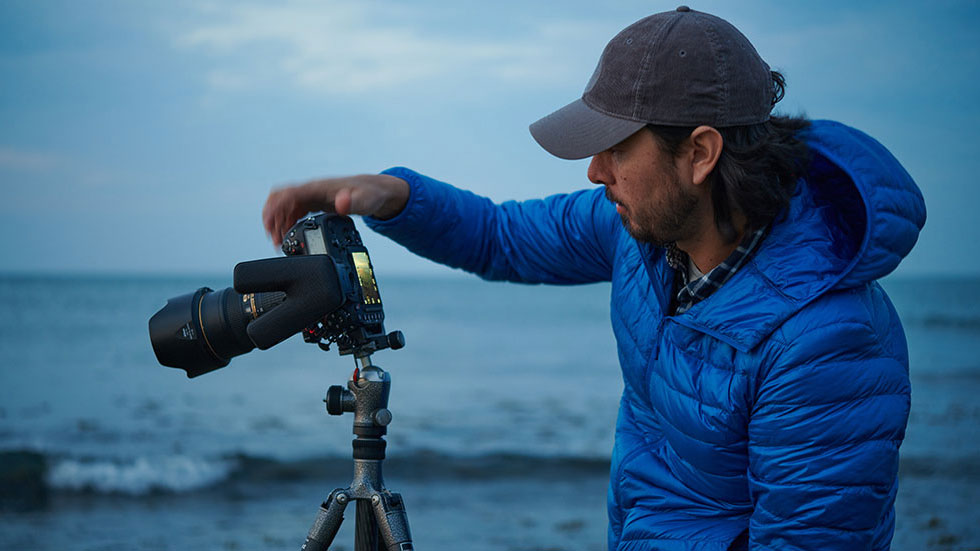
It’s summer, the perfect time to hit the beach with your camera! I’ve been very fortunate to explore our wild world with a camera, experiencing all the excitement it offers and at the top of that list of fun is what I call beach panning. Those LBJs (Little Brown Jobs as birders refer to them are shorebirds) and they’re such great subjects. But being small and brown makes them a challenge to stand out visually from the background. We need to get close physically to make them bigger in our frame while blurring out the background, so they visually pop. By lying on the beach, we get the image size and the clean background while having fun in the sun all at the same time!
From their point of view, we must seem like giants! We get less imposing by getting down to their level, which is in large part of the success of the beach panning technique. Yet it’s not so much our size but our feet that make shorebirds move away from us. Their eyes don’t really need to look up when they see our feet walking in their direction. Shuffling your feet rather than taking steps will by itself help you to get closer. When you lie on the beach, you take feet and the statuesque human form out of the equation, which puts them at ease. And to be honest with you, I’ve always thought that birds figure anybody willing to lie with them are not to be feared, so why not get closer?
Okay, now that we know how to get closer to them, how do we make them visually pop in our photographs? Shooting at their eye-level no matter the focal length, puts the plane of focus totally perpendicular to the bird and the background instantly melts into the distance, creating a gorgeous watercolor. The only downside to this technique, as I see it is getting back up after shooting. Let’s worry about that later!
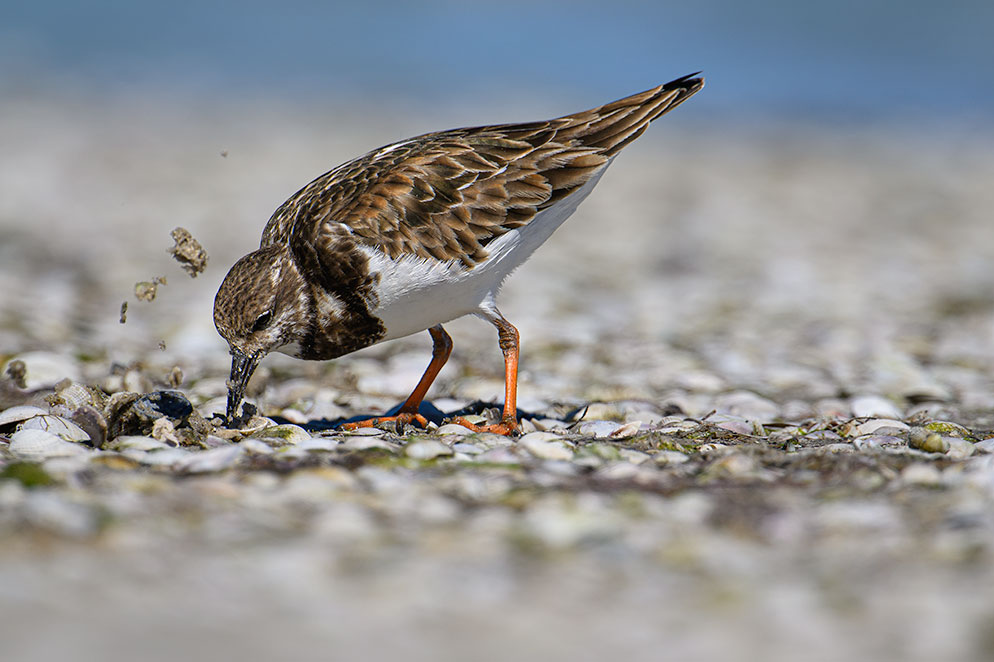
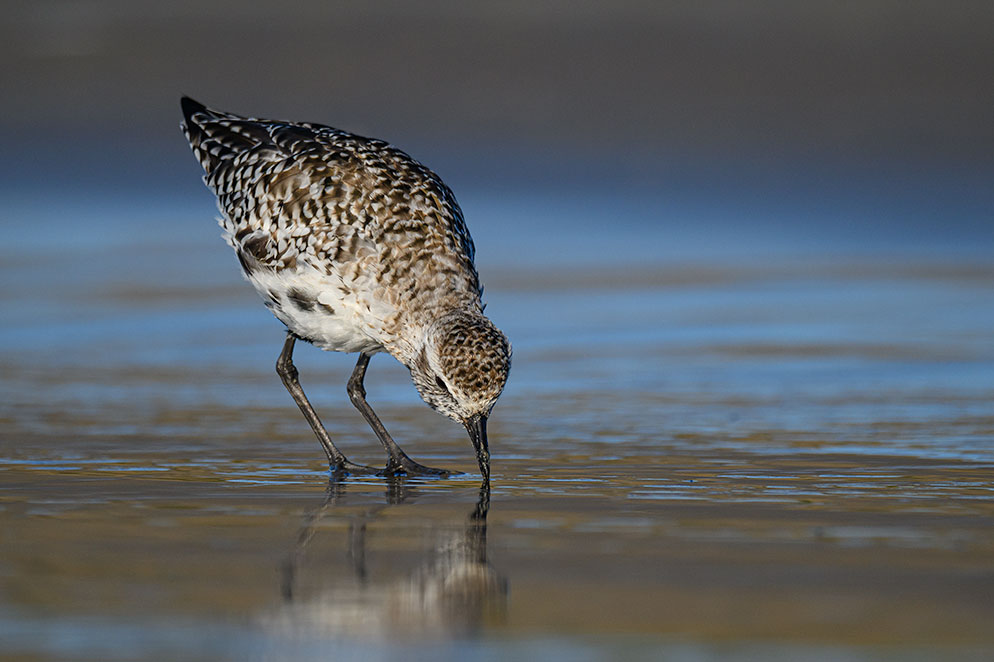
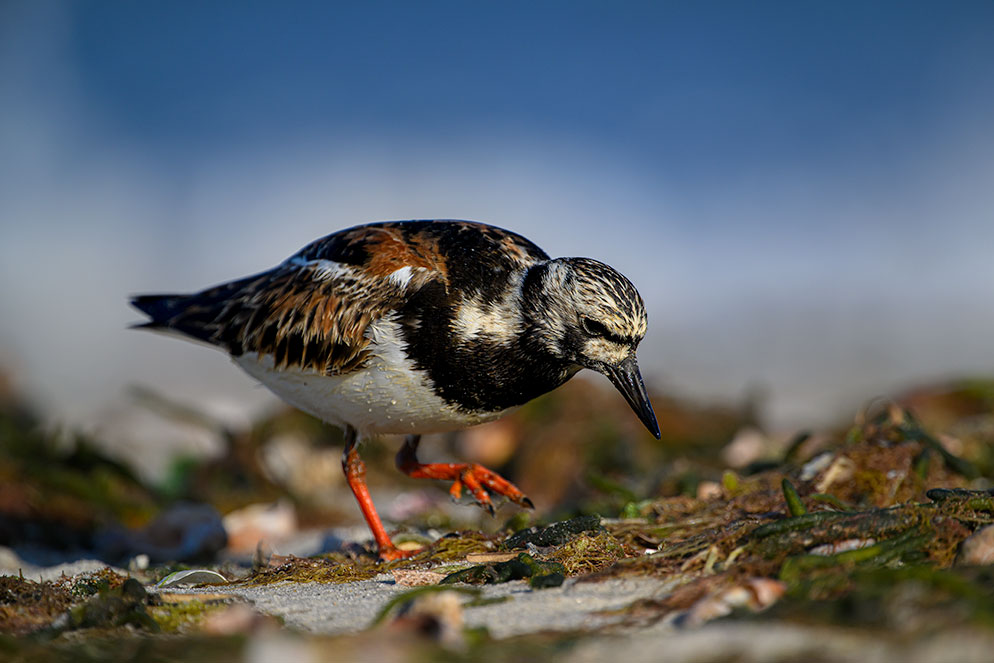
Ruddy Turnstone - Z 9, NIKKOR Z 400mm f/4.5 VR S TC 1.4x, 1/1000 sec, f/6.3, ISO 100, Aperture priority.
Gear Talk
There is one specialized piece of gear I recommend but it isn’t required. I shoot with two lenses, although nearly any lens works, once you’re on the bird’s level. I prefer the NIKKOR Z 400mm f/4.5 lens with the 1.4x NIKKOR Z Teleconverter or the AF-S NIKKOR 800mm f/5.6 lens with the Mount Adapter FTZ.
One can easily lie in the sand, photographing shorebirds with the light and incredibly sharp 400mm f/4.5 lens and TC combo and provide the needed stability for a sharp photo while resting on your elbows. Longer lenses though require one piece of specialized gear, a panning plate. There are many on the market; I prefer the Walt Anderson Panning Plate. For mobility on the sand, I recommend you put the panning plate in a frisbee, permitting you to easily slide it around on the sand. This setup provides all the stability a big lens like the 800mm requires, with the flexibility to pan with the moving shorebirds (they hardly ever stay still).
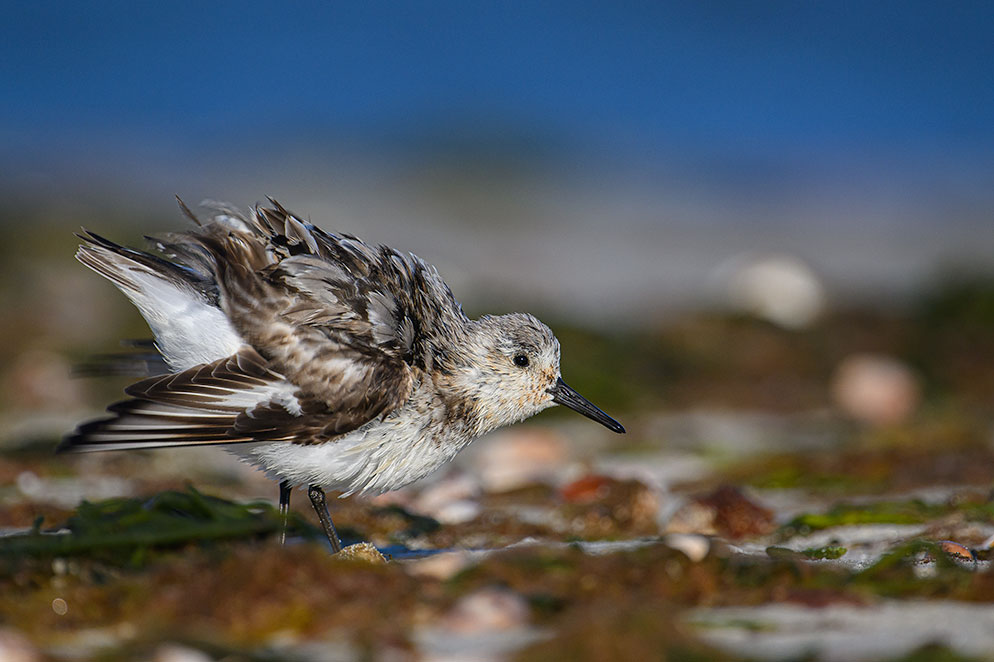
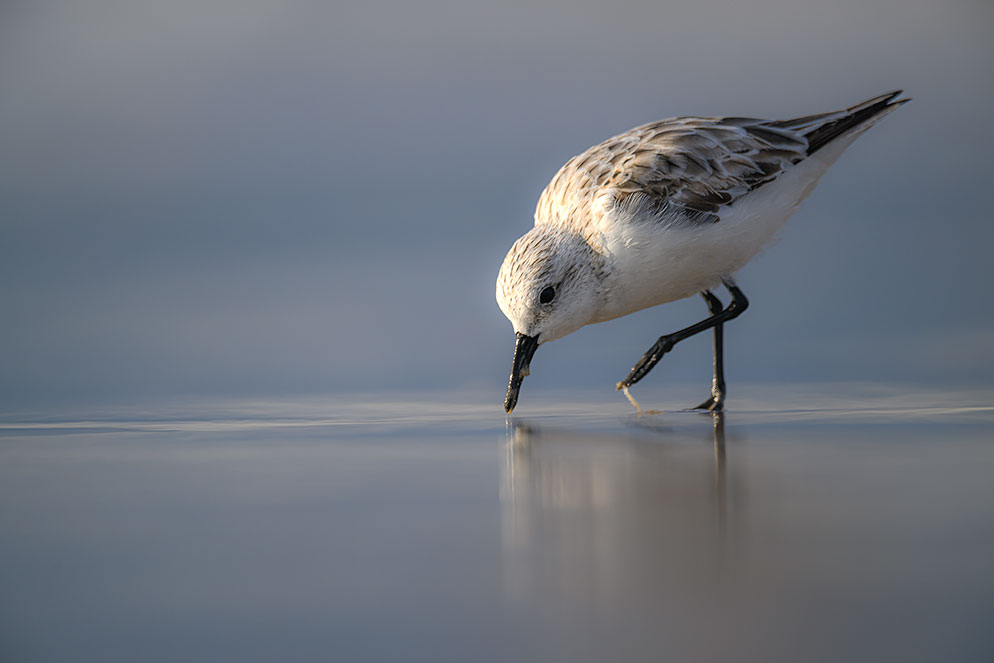
Sanderling - Z 9, NIKKOR Z 400mm f/4.5 VR S TC 1.4x, 1/1250 sec, f/6.3, ISO 400, Aperture priority.
The amazing autofocus we have available to us makes beach panning even more fun and successful! My preference with the Z 9 for example is Auto Area Autofocus with critter eye detection (Nikon calls it Animal eye detection autofocus). You will be blown away how fast and accurately this AF mode locks onto the eye of a shorebird as it darts about. This is a combination of the fast AF and ability to blur the background easily lets us keep our attention on the subject / background and the story we want to tell.
Shooting from the prone position whether handholding a short lens or using a panning plate and a long lens is not a natural technique for most photographers. The last piece of gear needed for beach panning is a flexible neck! I highly recommend literally practicing this technique on comfortable carpet before hitting the beach. Bending our necks while looking through the viewfinder takes a little practice. So does getting back up from the sand without using our hands (I’ll explain that in a moment). Literally hitting the beach requires very little gear, just a passion and desire to have fun!
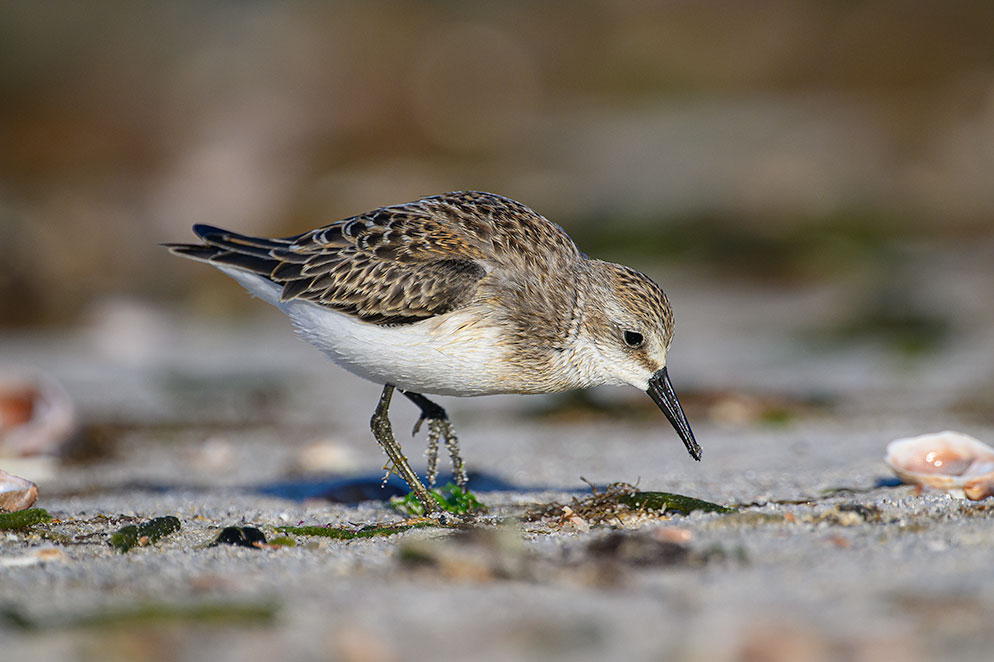
Semipalmated Sandpiper - Z 9, NIKKOR Z 400mm f/4.5 VR S TC 1.4x, 1/1250 sec, f/6.3, ISO 400, Aperture priority.
Getting Up and Down
Sand and camera gear are not a great mix! With that said I’ve not had an issue in my forty years of beach panning fun. Here’s how you avoid issues. Practicing on the safety of carpet really helps with this. We need to get down flat on the sand without using our hands, relying on our elbows. Sand, whether wet or dry, is sticky and can easily transfer from our hands to our gear. By not getting sand on our hands in the first place, we can take that out of the equation. When getting up, we need to avoid using our hands again, so they remain sand-free. And when we get up, we have to remember sand is probably stuck to our forearms and our clothing. We need to get up in such a manner that the sand does not fall on or get blown onto our gear that is still lying on the beach. While this sounds like a challenge, you’d be surprised how simple it is with a little practice.
Two other helpful items are a tripod, and a white towel. Why the tripod? If you’re using a longer lens on a panning plate, the tripod gives you a simple and safe way to transport your big lens to the sand. It provides a platform up out of the sand to hold your lens while you get set up to lie down and a place to secure your rig when you come back up to get “sand free.” And that’s when the white towel helps. A clean, dry, white towel is a huge asset. When you get back up from the sand, you want the sun to first dry out the sand that might be stuck to you or your clothes. You then can shake, brushing off any remaining sand. That white towel can then be used to get the “salty moisture” off your hands so you can then move your camera about either to the next bird or back to your vehicle. (Be sure to thoroughly clean your gear when you get home as salt air needs to come off all surfaces.)
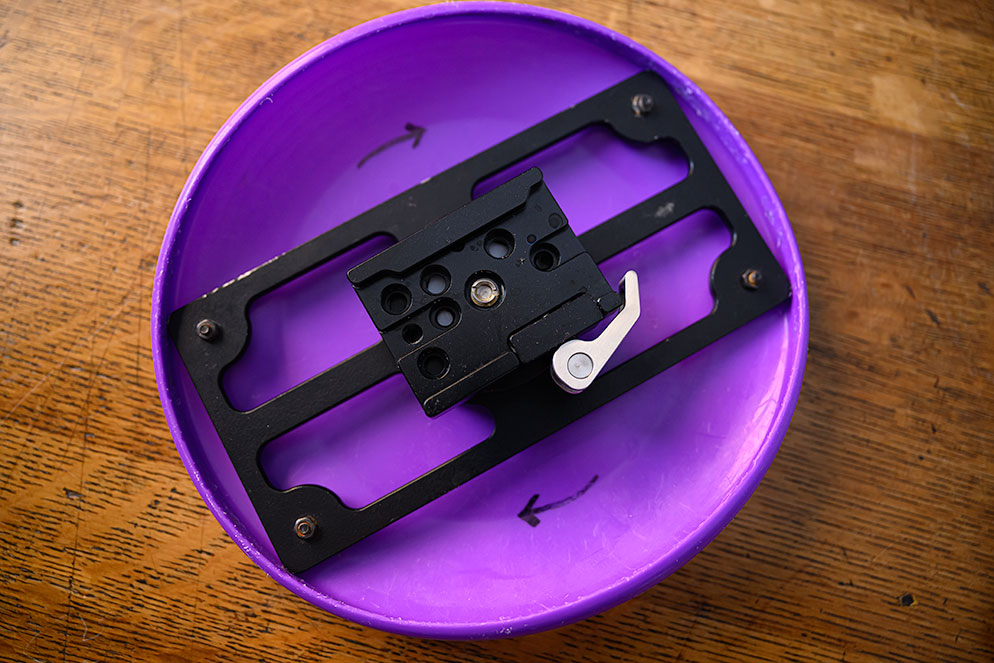
The panning plate fits nicely inside the Frisbee and is easy to use on the sandy beach.
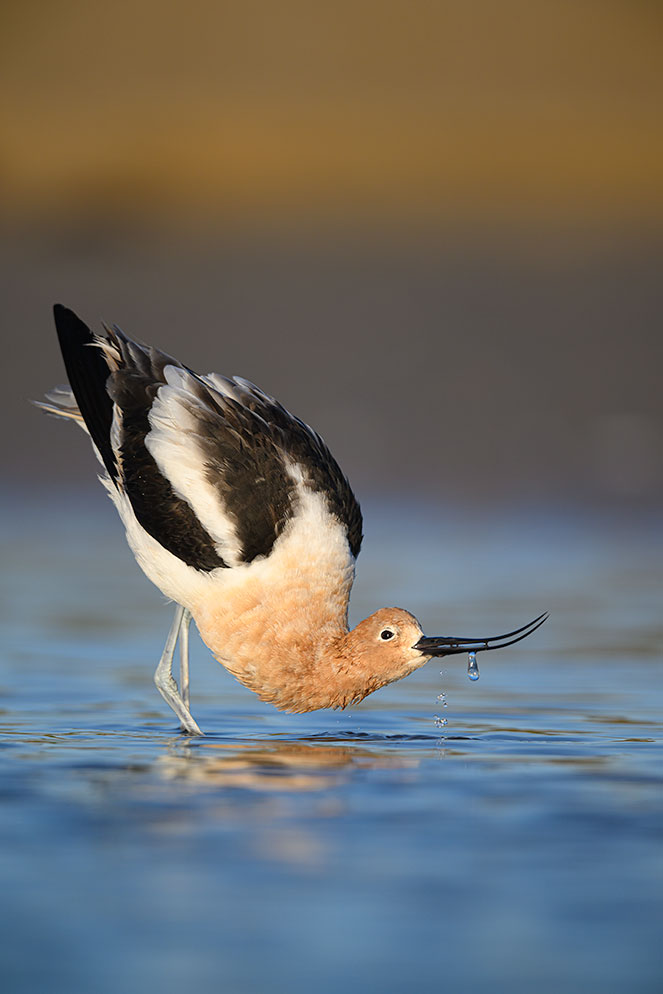
American Avocet - Z 9, AF-S NIKKOR 800mm f/5.6E FL ED VR, Mount Adapter FTZ, 1/1000 sec, f/7.1, ISO 400, Aperture priority.
Bringing motion to the still
Shorebirds spend a lot of time chasing the waves back into the ocean! Running as fast as they can as they can to scour the sand for a morsel. They do stop running for a moment, to feed, using a sewing machine motion probing the sand for that tasty treat. All of this action is why we’re using the panning plate so we can literally pan with the action to tell the story of the motion in our stills. Bringing this all together in a photograph requires a combination of technical aspects of photography we need to keep in mind as we arrange the elements to take the shot.
Panning is the act of the camera keeping pace with a moving subject. When this is accomplished, we “freeze” the motion of the subject capturing that sharp image. This takes a little practice which you can do by lying on a carpet and having someone roll a tennis ball slowly past you. A tennis ball is the size of your basic shorebird. When you practice think about the motion of the shorebird as well as the background. Depending on which you want to use to tell your story will determine the aperture, shutter speed and ISO you’ll want to shoot with.
Sanderling - Z 9, AF-S NIKKOR 800mm f/5.6E FL ED VR, Mount Adapter FTZ, 1/1000 sec, f/8, ISO 400, Aperture priority.
If you’re panning with a shorebird to tell the story of how fast those little legs go, you’ll want a shutter speed slower than 1/125. The panning motion of the camera/lens will “freeze” the body of the shorebird but the legs running motion will blur. The background will also blur while you pan, adding to the illusion of movement in your image. Keep in mind that the one element of the photograph in wildlife photography that has to be sharp, no exception, is the eye!
Conversely, if you want to capture the feeding behavior you’ll need a faster shutter speed. To capture that motion, you’ll want a shutter speed faster than 1/250. Capturing that feeding still requires panning as you have to keep up with the shorebird as it scurries across the sand to catch its prey. It will stop quickly, probe the sand for food and move on. You pan knowing this is going to unfold requiring you have the shutter speed already in place in order to capture that behavior.
Shooting in Aperture priority, to accomplish all of this with the speed of your subject simply requires opening and closing down your aperture. One of the beauties of beach panning is the background is so far away from the subject. Closing down your aperture might bring a little more of the subject into focus but not the background. Simply select the aperture you want for the shutter speed desired. At times you might have to raise your ISO but that’s easily accomplished. Just keep in mind the end goal is to show movement.
American Golden Plover - Z 9, AF-S NIKKOR 800mm f/5.6E FL ED VR, Mount Adapter FTZ, 1/640 sec, f/7.1, ISO 400, Aperture priority.
Let’s make some photographs!
Beach panning seems to be the most successful in the morning when the tide is going out. The outgoing tide exposes the food source that the shorebirds have gathered to feed on. Keeping in mind that it only takes one bird to make your morning, scan the shoreline, looking for birds and once found, head in their direction. Keep the light in mind and if the birds you see are backlit, make a big circle so you approach them, or they approach you frontlit. At a minimum of twice the distance you desire for the image size you want, it’s time to hit the sand. During this process, walk slowly, keeping your feet as low to the sand as you can. If you push the birds off, don’t fret because they will come back to feed. Repeat this simple mantra in your mind—keeping the sun and wind at your back. This makes for the best bird photography.
Generally speaking, it takes about 10 minutes for the birds to ignore your presence entirely. During that time, watch them and start taking mental notes. For example, Sanderlings tend to create temporary “territories” or sections of the beach they consider their own. They then chase off other Sanderlings from that section. This can make for great images. Gulls might come over to harass a shorebird that’s found a juicy morsel. Others like to sleep in the company of other feeding birds. You’ll see patterns and these patterns lead to either getting closer and/or stronger photographs. Each species is unique, providing you with endless visual story ideas.


American Avocet - Z 9, AF-S NIKKOR 800mm f/5.6E FL ED VR, Mount Adapter FTZ, 1/1600 sec, f/8, ISO 400, Aperture priority.
It's important to keep in mind the very narrow depth of field you have and distractions in the background. Let’s say you have a Least Sandpiper in the viewfinder (a bird smaller than your fist). Birds move and if an all-white gull gets in the background behind that sandpiper the viewer’s eye will go to the bright gull rather than the sandpiper. Or that sandpiper might move and get in front of some beach trash. After some time, you more than likely will find yourself with more birds than you can imagine with bird parts, legs, bills, tails in the frame you don’t want. You’d be surprised how fast that lonely beach you once saw fills up.
It's also important to remember your limited motion you have, to track a subject. When you’re practicing, figure out for yourself how much you can “twist” to keep a subject in the viewfinder. Remember what you’ve learned so when you’re on the beach, you can take advantage of the light you want and then only shoot in that area.
I have just two other precautions before you hit the beaches. The birds will end up ignoring you and will get so close you cannot focus on them. When this happens, move slowly to keep them from flying off. Lastly, beach panning is really addicting! It is truly the best fun and most rewarding bird photography you can instantly master. The experience and the photographs you’ll come home with will blow you away! The more you do it the better you’ll become as you learn more and more about the different bird species and what makes them unique. Beach panning, a simple and fun way of elevating your bird photography!
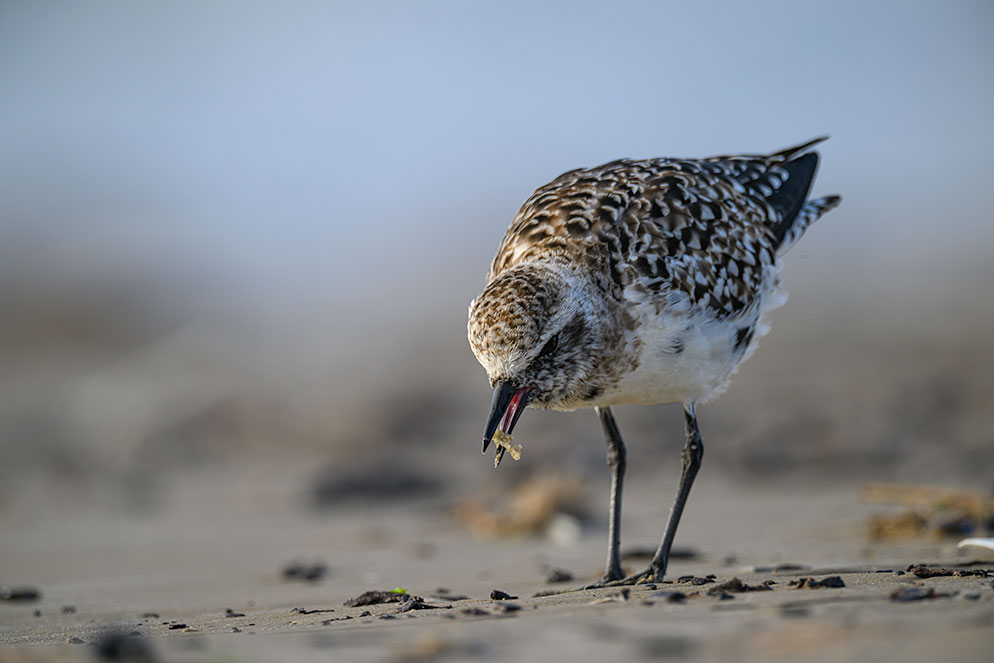
Rud - Z 9, NIKKOR Z 400mm f/4.5 VR S TC 1.4x, 1/1250 sec, f/6.3, ISO 400, Aperture priority.