Best Bird Photos: The Keys are Patience, Practice and a Great Camera & Lens Combo
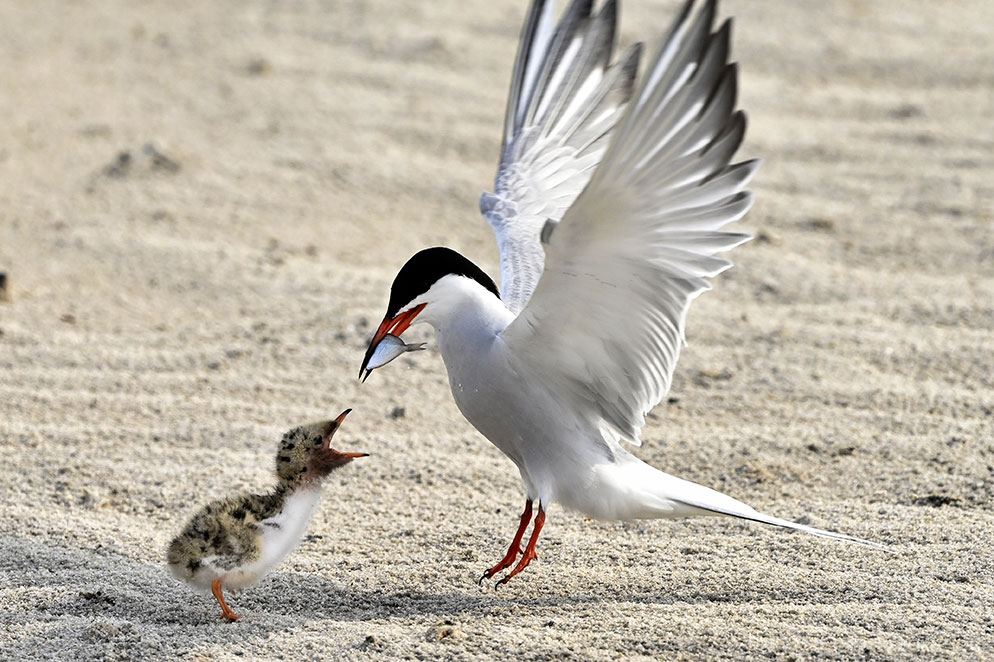
“There were hundreds of terns at the shoreline, the parents going back and forth from the water to the beach, feeding their young. I was lying in the sand behind a fence line, following this one chick, and the parent flies in and a split second later this happens. It was a back-button shot: as the chick stopped moving and opened its mouth, I let go of the AF-ON button and squeezed off a five-shot sequence. This one, an instant before the landing, was the perfect moment.” Z 7II, Mount Adapter FTZ, AF-S NIKKOR 500mm f/5.6E PF ED VR, 1/2000 second, f/6.3, ISO 500, manual exposure, Matrix metering.
When he started taking photographs of birds, Lindsay Silverman was satisfied with what most of us would consider nicely done images: sharp, of course; close enough to be detailed; colorful, if the bird was of a colorful type; and with suitable, non-distracting backgrounds.
His satisfaction lasted just long enough for him to realize he really liked photographing birds, and that nicely done images were not nearly enough.
Lindsay is a passionate, driven photographer; he is also a restless one who believes his best shot will come tomorrow if he works at it. “I wanted more from the images,” he says. “It could be the little gestures, the subtle things that make the shot different, but more likely it would be the peak moments—taking off, landing, something with motion, something interesting, even extraordinary—not just the bird sitting there posing for a picture.”
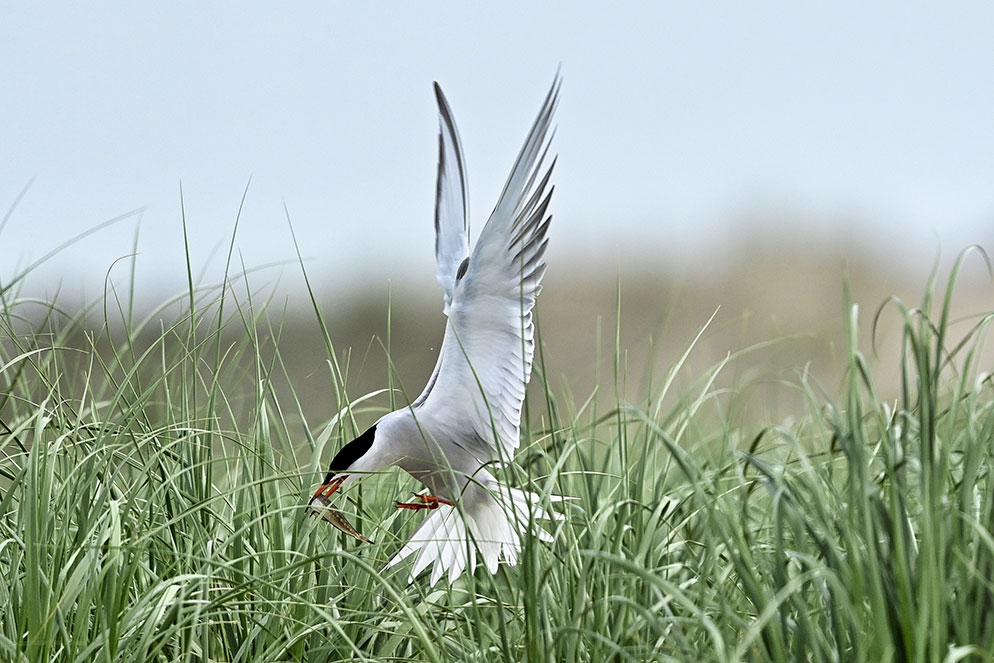
“I had the camera set for focus tracking with lock-on as the tern came in. It would be easy for any AF system to be fooled and switch focus to the tall grass, but I was using Blocked Shot AF Response, and the camera delayed refocusing on the grasses. This frame is the fifth or sixth in a ten-image sequence.” Z 7II, Mount Adapter FTZ, AF-S NIKKOR 500mm f/5.6E PF ED VR, 1/2500 second, f/5.6, ISO 640, manual exposure, Matrix metering.
Go Big, Go Long
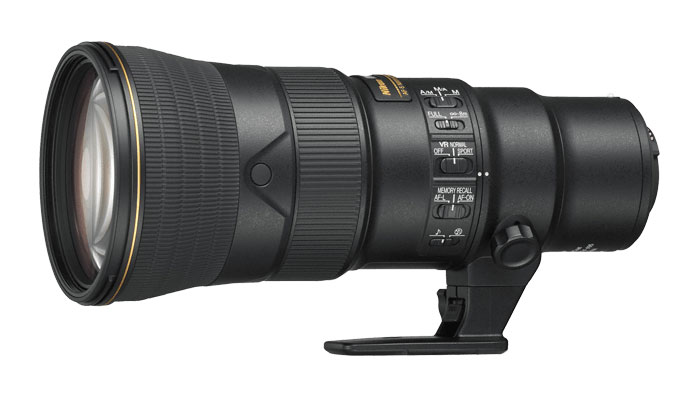
His gear was more than up to the challenge of “more.” He was shooting with the Z 7II because mirrorless meant lighter and smaller, plus he wanted every bit of the 7 II’s 45.7-megapixel resolution so the odd bit of branch in a composition would look better gone through cropping and the occasional horizon that needed a touch of straightening would get it. His go-to lens was the AF-S NIKKOR 500mm f/5.6E PF ED VR for its relatively light weight (just over three pounds) and small size (9.3 inches). And the 500mm’s VR (Vibration Reduction) technology would be combined with the Z 7II’s in-camera image stabilization to capture the sudden moves and fast flights of his subjects.
“A big key for me is not just the 500mm’s speed of achieving AF, which is lightning fast, it’s also how fast and how precisely it stops when it’s zeroed in,” Lindsay says. “There’s no hunting, no searching—it’s on it, and that’s vital for this kind of photography.”
The 500mm’s reach proved effective for situations when the birds were close enough for to him to shoot at the 7 II’s full-frame (FX) format, but when they were further away, he switched the camera to DX crop mode to take advantage of the 1.5 magnification factor and give the 500mm lens the equivalent of a 750mm view.
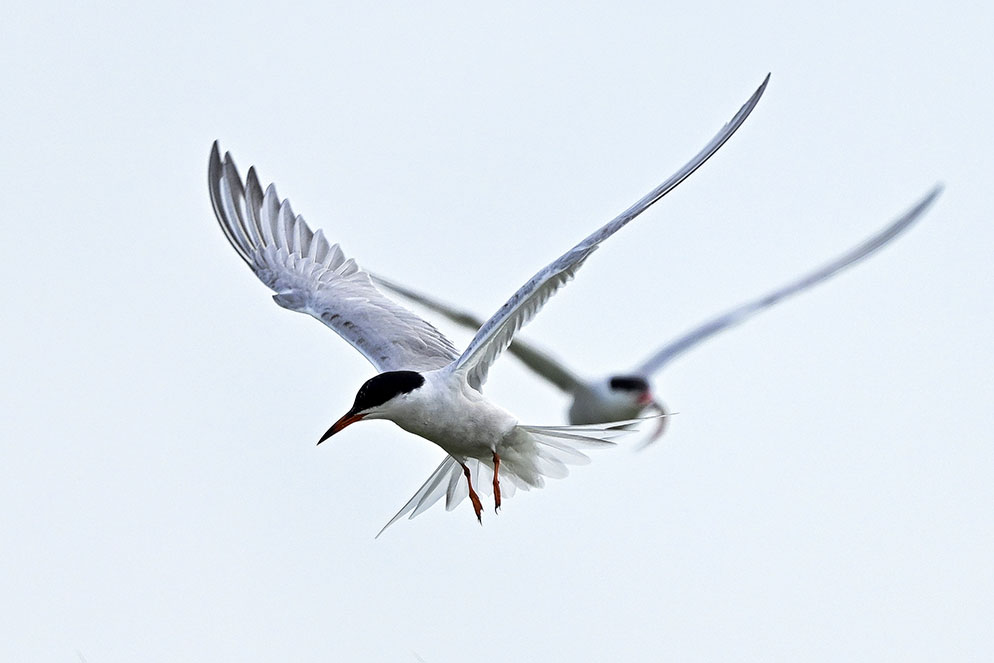
Whenever possible Lindsay will avoid the sameness of a milky, blank-sky background. “I waited this one out, hoping for something—specifically, another bird—to give the image depth and interest.” Z 7II, Mount Adapter FTZ, AF-S NIKKOR 500mm f/5.6E PF ED VR, 1/3200 second, f/5.6, IS) 640, manual exposure, Matrix metering.
“A big key for me is not just the 500mm 5.6’s speed of achieving AF, it’s also how fast and how precisely it stops when it’s zeroed in. There’s no hunting—it’s on it.”
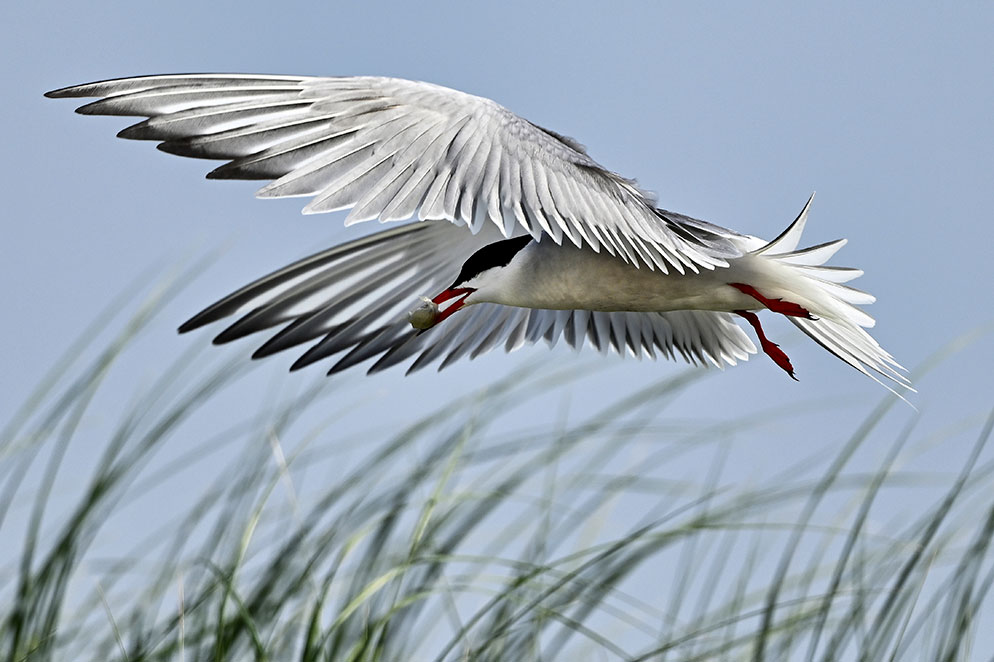
“Back-button AF again. I was locked on the bird all the way, and as soon as it got right in front of me I lifted my thumb and pressed the shutter for a five-shot sequence. This frame captured drama, grace and detail—and I got lucky because the wings didn’t obscure the bird’s face.” Z 7II, Mount Adapter FTZ, AF-S NIKKOR 500mm f/5.6E PF ED VR, 1/2500 second, f/5.6, ISO 200, manual exposure, Matrix metering.
As You Like It
Lindsay’s first and likely most important step in photographing the birds was setting up the camera so his responses to scenes and situations would be swift and seamless. In a word: customization. In lots of other words: personalizing the camera so that he’d be ready for anything, including making changes to custom settings to compensate for changes in light, location or the birds’ activity.
Here are a few custom settings he made to be ready to capture the images you see here.
• The Auto ISO Strategy. Fast shutter speeds are essential for these images, and once Lindsay makes his speed setting for a situation, he doesn’t want to have to change it if the light changes or the birds are in shadow. So, he sets Auto ISO on his camera, which locks in the shutter speed and aperture he’s selected and will automatically boost the ISO to compensate for any change in the light. As a result, his chosen shutter speed and aperture stays chosen.
• The Back Button (AF-ON) Maneuver. “For a stationary or fairly stationary subject I’m going to use single point continuous AF,” Lindsay says, “and because I’ve programmed the AF-ON button on the camera, I can focus using my thumb on that button. Then, with my index finger on the shutter release, I wait for the bird to make the slightest move—or sometimes even sense that move coming—I press the shutter.”
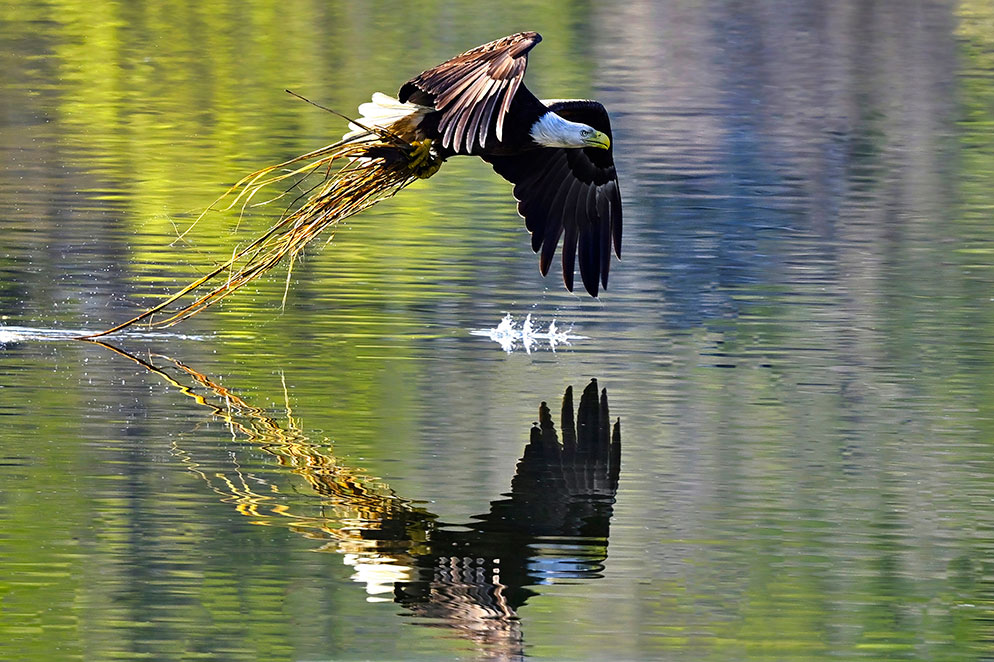
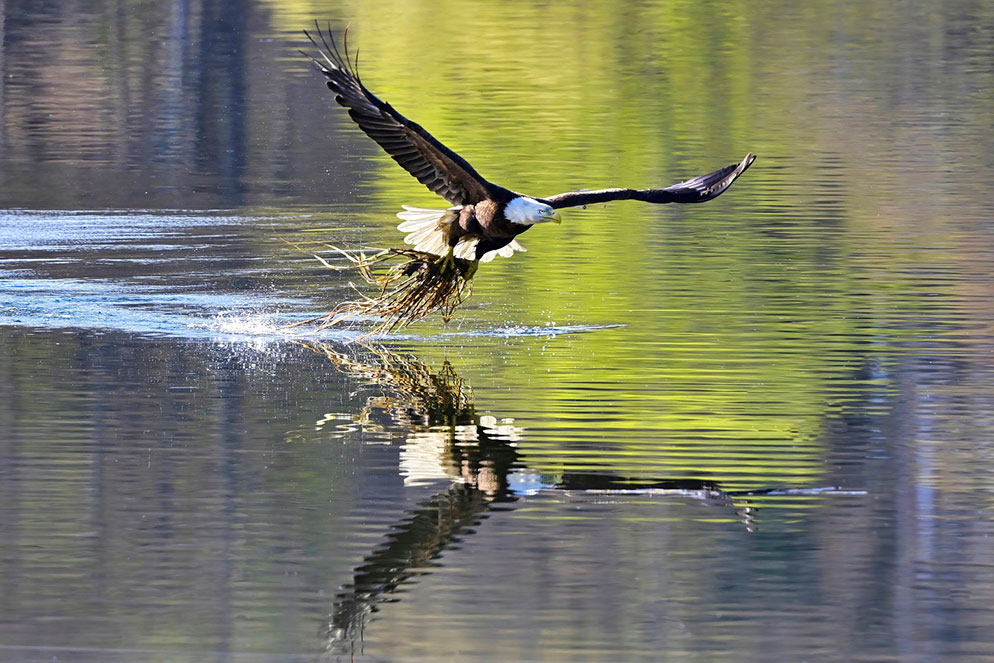
• The Aerial Approach. “When the bird is in the air, different story. I’ll switch from single point AF to Wide-area Large and use traditional shutter-release AF, the LCD viewfinder’s i- menu makes these changes easy and quick. For really large birds I’ll use Auto-area AF and activate subject tracking—that’s how I got the images of the bald eagle carrying nest-building supplies. I also set the Z 7II to shoot at nine or ten frames per second for birds in flight.”
• The Block Shot Tactic. Lindsay finds this handy when another bird appears in front of the bird he’s tracking, or when the bird he’s tracking touches down behind something like tall grass or a fence. The setting is called Blocked Shot AF Response, and it means that he can choose to have the Z 7II delay refocusing on what’s come between his lens and his subject and continue to track whatever he’s locked onto.
“Another frame from the eagle sequence, further on in the takeoff, and what makes this image special for me is the gesture of the wings and the way the camera caught the wide dynamic range of highlights and shadow, from the tops of the wings to the eagle’s shadowed face in all its fierceness and determination.” Z 7II, Mount Adapter FTZ, AF-S NIKKOR 500mm f/5.6E PF ED VR, 1/2000 second, f/5.6, ISO 1000, manual exposure, spot metering.
Lindsay caught this bald eagle heading home with supplies to repair or enlarge the family’s nest. “I got to the location at first light and waited at the pond where the eagles fish. The light was beautiful, and there were great reflections along the shoreline. Suddenly this eagle came down, grabbed up grasses and straw and took off, and I was able to pan with its flight path to get a sequence of images.” Z 7II, Mount Adapter FTZ, AF-S NIKKOR 500mm f/5.6E PF ED VR, 1/2000 second, f/5.6, ISO 1000, manual exposure, spot metering.
Flight Plans
While customizing your camera is as close to vital as you can get if you want to up the odds of coming home with winners when photographing birds, tech magic isn’t the whole story.
“I’m a newbie when it comes to birds,” Lindsay says, “and the most important thing was learning what I needed learn: where they’d be, and at what times of day, and what they’d be doing. I learned that knowing the bird was the first step in knowing the habits and habitats. I learned that the birds have certain gestures and attitudes, and that I could anticipate those things and know where to be standing and what to be framing. I learned very quickly that if I was pointing my lens all over the place, I was not going to have a lot of success. I had to understand what was going on. I learned to not go out with preconceived ideas of what I was going to get—that led only to disappointment. The only idea I have is, I’m going to photograph birds. And you know what? The more I went out, the better I got."

